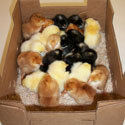
Chicks shipped by mail require a little extra TLC compared to chicks you might hatch at home. Think about how you feel after a long journey — dehydrated, exhausted, probably a bit cranky. What you look forward to most is a long drink and a warm bed.
Baby chicks are no different. They suffer the same ill effects of travel as humans do. Plus chicks have the disadvantage of traveling in what, for a chicken, is an unnatural environment and not knowing when or where their journey will end. Understandably, by the time they arrive at their destination the chicks can be a tad disoriented.
Whether you intend to brood the chicks yourself or place them under a setting hen, the procedure is the same for the first 24 hours after their arrival by mail. To make the transition as smooth as possible, plan to pick up the chicks as soon as they arrive at the post office, rather than waiting while they travel a few extra hours to be delivered to your house by the mail carrier.
By the time the chicks arrive, they pretty much will have used up their limited ability to keep warm. Their immediate need is for external heat provided by a well-warmed brooder. To ensure rapid warming, the temperature at the brooder’s floor level should be slightly warmer than the usual brooding temperature of 95ºF.
For the first few hours after the chicks arrive, maintain a brooder temperature of 100ºF, making sure the chicks have enough room to move out from under the heater if they wish. Before the end of the day, reduce the temperature slightly, but keep it just above 95ºF through the next day. After that, maintain normal brooding temperatures based on the chicks’ body language as described in the “Chick Care Instructions” fact sheet.
Setting up your brooder at least 24 hours in advance ensures that the fixtures and bedding will be sufficiently warm for your new arrivals. To make sure the temperature is adequate, place a thermometer at floor level beneath the heat source. If the temperature is not adequate, lower the heat source or add an additional or stronger source of heat.
Some of the radiant panels on adjustable legs, designed for brooding chicks, don’t put out sufficient heat for the first couple of days, in which case a light bulb or heat lamp in a reflector should be used initially. Even when a radiant panel produces enough heat, chicks also need a source of light so they can see to find water and feed.
Immediately providing your new chicks with warm drinking water serves the double purpose of hydrating them plus helping boost their body temperature. Since water cools rapidly, fill the drinker with hot tap water. By the time the drinker is placed in the brooder, the water should still be around 100ºF.
While your chicks are adjusting to their new home, they may trample in the drinking water and become soaking wet and chilled and, as a result, can get sick or even die. To avoid this eventuality, use a drinker designed specifically for baby chicks and do not place it directly under the heat source, where chicks prefer to sleep. As you move each chick into the brooder, dip its beak into the warm water and make sure it swallows before releasing it under the heat source.
Jeff Smith of Cackle Hatchery additionally recommends adding 4 tablespoons of apple cider vinegar to each quart of the chicks’ drinking water for the first week. In Jeff’s experience, the vinegar greatly reduces the possibility chicks will suffer from the common disorder pasty butt.
After all chicks have had a warm drink, most of them will zonk out under the heater for a long nap. Some, however, may be ready to eat. Place a chick feeder filled with chick starter ration in the brooder, away from under the heat source. To help the slower chicks get started eating, sprinkle additional starter on a paper towel or paper plate placed on the brooder floor.
Refrain from handling your new chicks during the first 24 hours, but keep a watchful eye on them to make sure they are neither too hot nor too cool, and to lend assistance to any weak ones that might need your help staying warm or finding the water and feed. After the first 24 hours of their arrival, your chicks should perk up and be ready to take on the world.
And that’s today’s news from the Cackle Coop.
Gail Damerow, author, Hatching and Brooding Your Own Chicks (Chickens, Turkeys, Ducks, Geese, Guinea Fowl)


Da ga vegas79 chơi đá gà online cực kỳ hấp dẫn và kịch tính. Bộ môn được anh em sư kê trong giới chơi đá gà tham gia nhiều nhất.
Hi! I have an adopted Columbian Wyandotte Bantam, recently became broody. She sat on a clutch of eggs for a week, and then got kicked off her nest by my Buff Orps and Swedish. I have since moved her to a separate large crate to sit on some new eggs. Will she stay broody long enough to hatch the new clutch? We are really hoping to have some new babies this year; we started our flock with chicks and have been adopting all kinds from neighbors hoping to have some gorgeous mixed-breed babies. I candled the previous eggs and they seemed to have been growing. Also, is it too late in the season? Thanks!